Introduction
Thanks to its robustness and versatility, Java has always been at the forefront of the programming world. As any seasoned developer would vouch for, writing the code is just one part of the job. Testing the code is equally crucial. That's where JUnit comes into play. As a fundamental framework for Java, it allows developers to write and run repeatable tests, ensuring that the code behaves as expected.
This JUnit tutorial aims to guide you through the foundational aspects of JUnit. Whether you're just starting out in Java or looking to elevate your testing game, understanding JUnit can be a significant feather in your cap. In this JUnit tutorial, you'll get familiar with the basics of setting up JUnit and writing the first test. Grasping the essential techniques will help you make the most of this powerful tool. By the end of this JUnit tutorial, you'll be well-equipped to ensure that your Java applications not only work but work flawlessly.
Overview
When you do Java testing, the JUnit framework emerges as an invaluable tool for developers. From its early iterations to the more recent ones, it has continually evolved, offering a range of features to make Java testing smoother and more efficient.
For those integrating JUnit with the Spring framework, there's the “JUnit for Spring Boot tutorial”, tailored to provide insights into how these two tools can work together, maximizing their potential in application testing.
For developers eager to stay updated, the JUnit 5 tutorial dives deep into the newest features, advancements, and changes this version has brought. It captures the essence of what JUnit 5 offers.
What is JUnit?
JUnit is a widely-used testing framework for Java applications. It helps developers ensure that their code works correctly by allowing them to write tests for different parts of their applications. Each test checks a specific function or feature, and JUnit informs the developer if the tests pass or fail.
Example:
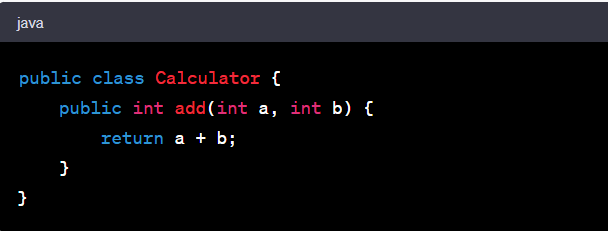
Imagine you've written a simple function that adds two numbers.
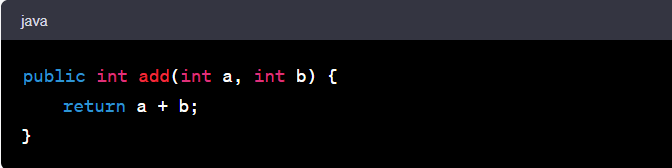
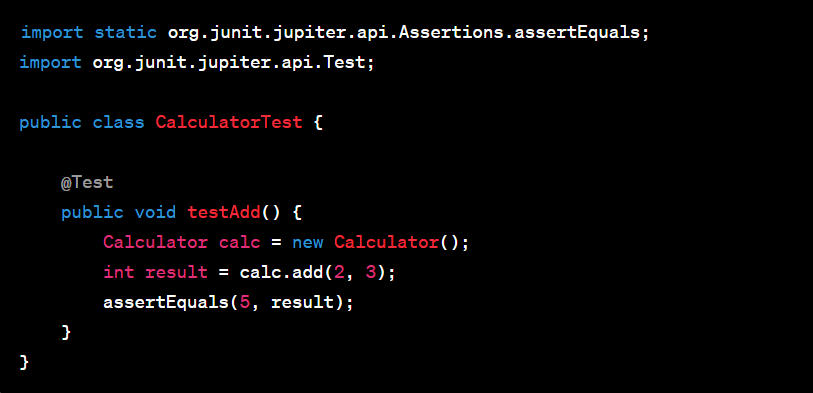
To test this function using JUnit, you would write a test case:
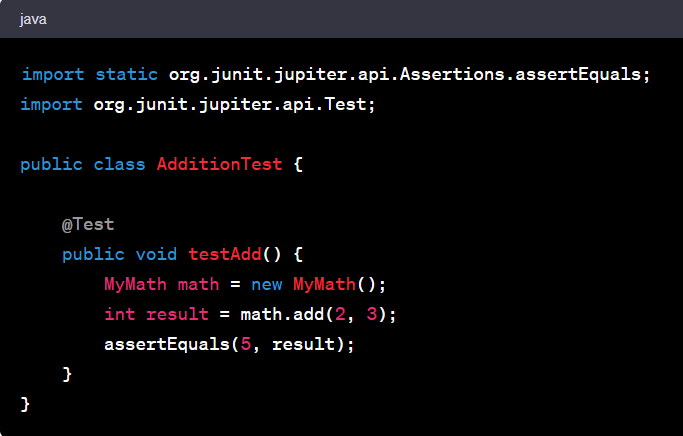
In the above test, we're using the assertEquals method from JUnit to check if the add function's result is 5 when adding 2 and 3.
Setting-Up JUnit: Step-by-Step Installation Guide
Prerequisites
Ensure you have the Java Development Kit (JDK) installed on your computer. If you don't, download and install it from the official Oracle website.
Choose Your IDE
While JUnit can work with any Integrated Development Environment (IDE), popular choices include Eclipse, IntelliJ IDEA, and NetBeans. Having an IDE will simplify the process.
Setting-Up Using Maven
- Open the pom.xml file in your project
- Add the following dependency for JUnit 5
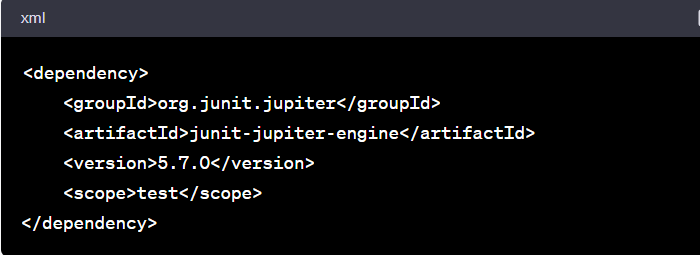
- Save, and Maven will automatically download the necessary files.
Setting-Up Using Gradle
- Open the build.gradle file
- Add the JUnit 5 dependency

- Sync your Gradle project to download the necessary dependencies.
Verifying the Installation
To check if JUnit was set up correctly:
- Create a new Java class in your src/test/java directory.
- Write a simple test using the @Test annotation:
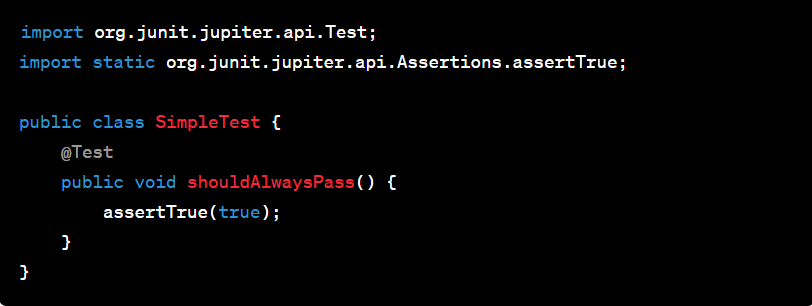
- Run the test. If everything is set up correctly, the test will pass without any issues.
Stay Updated
JUnit is actively maintained, and new versions come out regularly. Ensure you periodically check for updates and adjust your dependencies to leverage new features and improvements.
What is Unit Testing?
Unit Testing is a software testing technique where individual components or units of software are tested in isolation. The primary goal is to ensure that each unit functions correctly on its own.
Example:
Suppose you're building a calculator application. One of its functions is to add two numbers.
Before integrating this function into your application, you'll want to test it to ensure it works correctly.
A unit test for the add function might look like this:
Here, the assertEquals function checks if the output of calc.add(2, 3) is indeed 5.
Types of Unit Testing
1. Positive Testing
This tests the application's positive scenarios, i.e., it verifies the system behaves correctly when given valid input.
Example: For a login function, provide the correct username and password to ensure successful login.
2. Negative Testing
This tests the application's negative scenarios. It ensures the system can handle invalid input gracefully.
Example: For the same login function, provide an incorrect password. The system should display an error message without crashing.
3. Boundary Testing
This checks the system's response at the boundary values of accepted input.
Example: If an age field accepts values between 1 and 100, test with values 0, 1, 100, and 101.
4. State-based Testing
This tests the system based on its different states and transitions.
Example: For an online store, ensure that adding an item transitions a shopping cart from 'empty' to 'has items'.
5. Exploratory Testing
Instead of predefined plans or scripts, testers explore the application to find defects.
Example: A tester goes through a new feature to understand its behavior and look for inconsistencies.
Each type of unit test targets specific aspects of software functionality. This helps developers catch a wide range of issues. Properly implementing these tests increases software reliability.
Features of JUnit
1. Annotations
JUnit uses annotations to identify methods that specify a test.
Example: @Test marks a method as a test method, while @BeforeEach indicates that the annotated method will run before each test.
2. Assertions
These are tools for verifying that the outcome of a test matches the expected result.
Example: assertEquals(expected, actual) checks whether two values are identical.
3. Test Runners
These handle test suites and provide feedback on tests.
Example: JUnit provides a default test runner, but you can use others, like Parameterized, for running tests with different input values.
4. Test Suites
Grouping of multiple test cases for simultaneous execution.
Example: All tests related to user authentication can be grouped into one suite.
5. Mocks and Stubs
JUnit, with tools like Mockito, can mock external systems, ensuring the unit tests only check the unit's functionality.
Example: Mocking a database connection to test a function without actually connecting to a real database.
6. Extendability
JUnit can be extended with plugins and other tools for enhanced functionality.
Example: Integrating with tools like Hamcrest for more descriptive assertion checks.
7. Continuous Integration Compatibility
JUnit tests can be integrated into CI tools like Jenkins for automatic testing during software builds.
Example: Every time a developer commits code, Jenkins runs JUnit tests automatically.
A simple JUnit example in Eclipse IDE
1. Setting up Eclipse:
- Start Eclipse and open your Java project.
2. Adding JUnit to the Project:
- Right-click on the project
- Choose Build Path > Add Libraries
- Select JUnit and choose the latest version (e.g., JUnit 5)
- Click 'Finish'
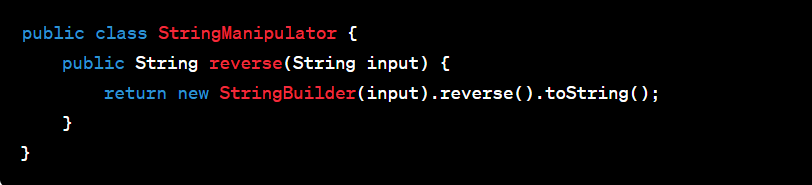
3. Creating a Class to Test:
Let's assume you have a simple class:
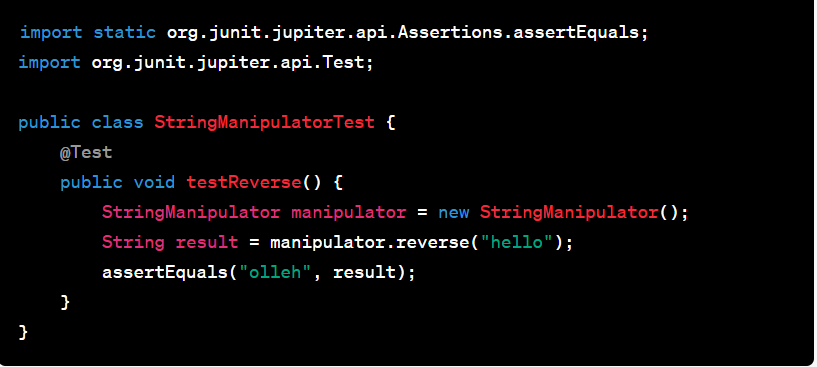
4. Writing the Test:
- Right-click on the src folder and select New > JUnit Test Case
- Name it StringManipulatorTest
- In the test class, write:
5. Running the Test:
- Right-click on StringManipulatorTest.java in the Project Explorer
- Select Run As > JUnit Test
6. Output:
- After execution, Eclipse will show a green bar if the test was successful or a red bar if it failed.
- You'll see the message "1/1 tests passed" if it succeeds.
JUnit Example: Testing a Calculator in Eclipse IDE
Calculator Class:
Imagine you have this class in Eclipse:
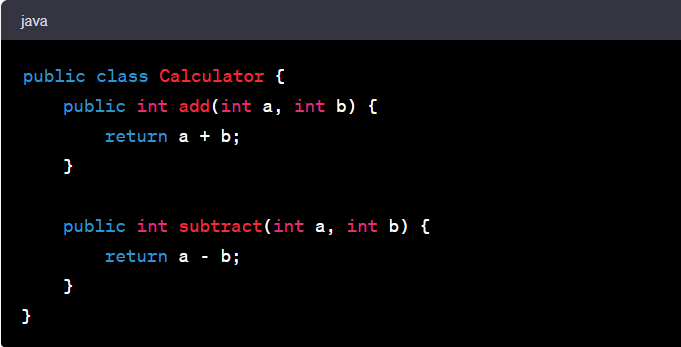
Here, the Eclipse editor is displaying the Calculator class with two methods: add and subtract.
JUnit Test Class:
Next, we'll create a JUnit test for the Calculator class.
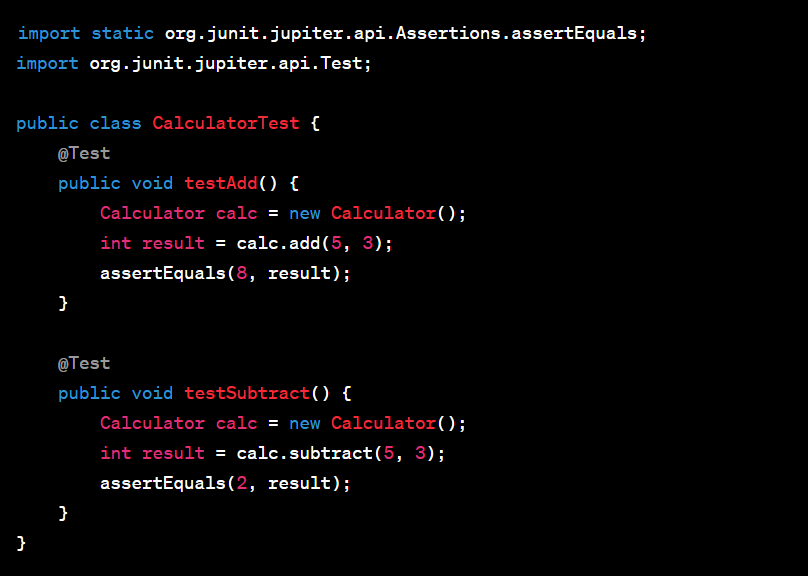
Here, the Eclipse editor next to the Calculator class is showing the CalculatorTest class. Two test methods are visible: testAdd and testSubtract.
Running the Tests:
In Eclipse:
- Right-click on CalculatorTest.java in the Project Explorer
- Select Run As > JUnit Test
Output:
Eclipse will provide visual feedback on the test results.
- If both tests pass, you'll see a green bar.
- If any test fails, you'll see a red bar and details about which test(s) failed and why.
Advanced Testing Techniques: JUnit Assertions and Annotations
JUnit Assertions
Assertions form the heart of unit tests, allowing you to validate the behavior of your methods. JUnit offers a set of assertion methods other than the basic assertEquals. Some advanced assertions include:
- assertThrows: Tests if a specific exception gets thrown.

- assertAll: Groups multiple assertions, and all of them get executed, even if some of them fail.

- assertTimeout: Ensures that a particular operation completes within a specified time limit.

JUnit Annotations
Annotations in JUnit help define the lifecycle of a test and provide metadata to guide the execution of tests. Here are some advanced annotations:
- @BeforeEach and @AfterEach: These run before and after each test method, respectively. Often used for setting up and tearing down resources, like database connections.
- @BeforeAll and @AfterAll: Unlike the above, these run just once before any tests and after all tests have finished in the test class. They are useful for initializing and cleaning up shared resources.
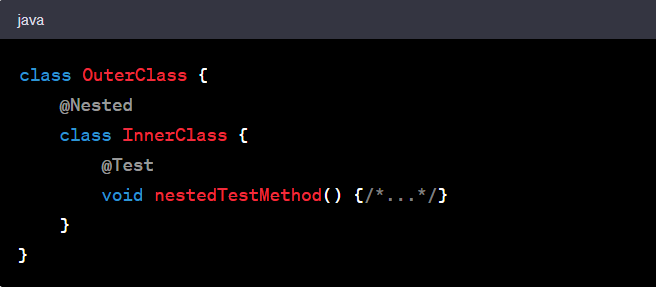
- @Nested: Allows for nested test classes. Nested tests can share setup and teardown but have their own isolated context, which is excellent for testing different scenarios or grouped test cases.
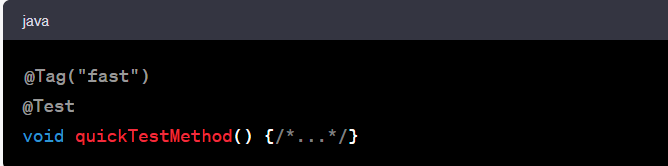
- @Tag: Useful for categorizing tests, especially when you only want to run a subset of your tests. For instance, you might have "fast" and "slow" tests, and you can use tags to filter them.
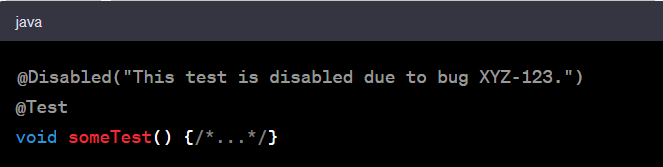
- @Disabled: Temporarily disables a test without deleting the test method.
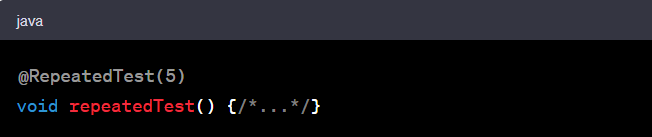
- @RepeatedTest: As the name suggests, it repeats a test a specified number of times. Useful for reliability or stress tests.
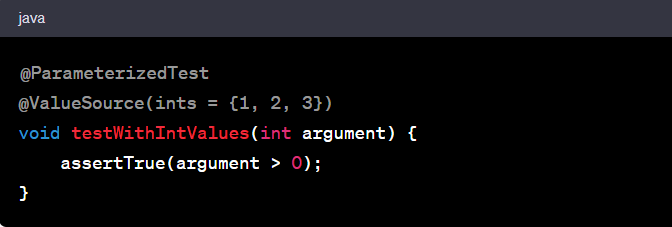
- @ParameterizedTest with @ValueSource: Allows you to run a test multiple times with different values, ideal for testing a method with various input values.
Conclusion
This JUnit tutorial for beginners has discussed the indispensability of JUnit for developers. Its flexibility extends beyond unit tests, enabling robust integration testing, especially when paired with frameworks like Spring Boot. By integrating with other tools, JUnit assures comprehensive testing across different layers and components of an application. Embracing JUnit guarantees code quality and fosters confidence in software deployment and functionality.
FAQs
1. How does JUnit compare to other testing frameworks like TestNG?
JUnit and TestNG are both popular testing frameworks in the Java ecosystem. JUnit is more widely adopted and is often the default choice for many Java projects, particularly with its latest version, JUnit 5, which introduced a lot of new features. Whereas TestNG was designed with broader testing scenarios in mind, including integration and end-to-end tests. It offers features like parallel test execution and flexible test configuration. The choice between them often boils down to project needs and developer preferences. What's the significance of the @RunWith annotation in JUnit?
2. What's the significance of the @RunWith annotation in JUnit?
The @RunWith annotation tells JUnit to use a custom runner instead of the built-in runner. It's often used to integrate JUnit with other frameworks or customize the test execution process. How does one integrate JUnit with Maven or Gradle?
3. How does one integrate JUnit with Maven or Gradle?
To integrate JUnit with Maven, you add the JUnit dependency to your pom.xml file. For Gradle, incorporate it into your build.gradle file. Both Maven and Gradle have plugins that recognize and run JUnit tests as part of the build process, making it seamless to include unit tests in your continuous integration pipeline. Why integrate JUnit with Spring Boot for testing?
4. Why integrate JUnit with Spring Boot for testing?
Integrating JUnit with Spring Boot offers a streamlined approach to testing applications built on the Spring framework. Spring Boot provides utilities like @SpringBootTest, which sets up a pseudo-application context, making testing Spring components like services, controllers, and repositories easier. What are the best practices for writing effective JUnit tests?
5. What are the best practices for writing effective JUnit tests?
Keep them isolated: Ensure that each test stands alone and doesn't depend on the state set by other tests.Aim for clarity: Someone reading your tests should quickly understand the functionality being tested.Use meaningful names: Test method names should be descriptive, explaining the intent of the test.Limit the scope: A unit test should verify one piece of functionality or behavior at a time.Ensure idempotence: Running a test multiple times should yield the same result every time. Keep them isolated: Ensure that each test stands alone and doesn't depend on the state set by other tests. Aim for clarity: Someone reading your tests should quickly understand the functionality being tested. Use meaningful names: Test method names should be descriptive, explaining the intent of the test. Limit the scope: A unit test should verify one piece of functionality or behavior at a time. Ensure idempotence: Running a test multiple times should yield the same result every time.


-d9bdeff6165f4eb1ba2adcebde78e961.svg)


-ae8d039bbd2a41318308f8d26b52ac8f.svg)
-35c169da468a4cc481c6a8505a74826d.webp&w=128&q=75)
-7f4b4f34e09d42bfa73b58f4a230cffa.webp&w=128&q=75)

%20(2)-db0b6f38da9c485faf76e366793c9b9e.webp&w=128&q=75)